Wednesday, August 27, 2008

Makin' It Pop!

So now you've started working on some posts, but you want more than just words. You want images! And video!

Adding Images
Throughout my posts I've added two types of images; images that I have saved on my computer (eg all the screen shots I've shown), and images that I have taken from Flickr (with Creative Commons licenses).

How to add photos from your computer
  • In the toolbar is an 'Add Image' icon (see image below), click on it
  • A window opens up and you do the following
  1. Click 'Browse...' and then select the image file from your computer's hard drive.
  2. Choose the layout. Do you want the image centered or to the left or right?
  3. Choose the size.
  4. Upload Image.
For some reason my uploaded images always appear at the top of my post. I simply cut (ctrl x) and paste (ctrl v) them where I'd like them.

How to Add Photos From Flickr or Other Photo Sites

Once you find an image on another site, you want to be sure that you have the right to copy and post it. In Flickr you can search images with
Creative Commons licenses. Right click on the image and select 'Copy Image Location. Go back to your post and select the 'Add Image' icon, just like before, but this time choose 'Or add an image from the web'. Paste the image location (ctrl v) in the box, do steps 2 - 4 from above and viola, you get a lovely image like the one below (flickr typewriter typo?! by bitzi) . Don't forget to attribute the photo to the photographer and provide a link back to the site from where you got the image.
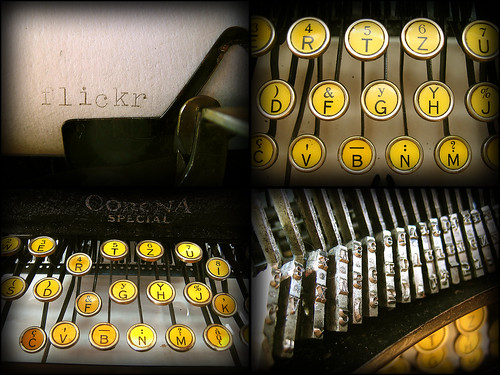

Photo by Richard Hook
Attribution-NonCommercial-NoDerivs License
An easier way to deal with the whole Creative Commons search and proper attribution is to use Simple CC flickr Search which provides you with an embed code which will automatically put in the attribution info. Once you find a photo you like on Simple CC flickr Search, click on it and copy the embed code. Come back to your post and select the 'Edit Html' tab. Insert the code where you'd like the photo to be. That is how I did the image to the right.

What About Video?
If you find a great video from YouTube (works very similarly with other video sites) you can embed it in your post as follows.
  • Once you've selected the video you like, click on 'Customize' found to the left of the YouTube TV screen.
  • Now do the following
  1. Select 'Don't include related videos'. This allows you to avoid having skanky videos promoted on your blog.
  2. Choose whether to have a border and decide on the colour
  3. Copy the embed code (ctrl c)
  • Now go back to your post, click on the 'Edit Html' tab and paste (ctrl v) the embed code where you want the video to show up. Below is one of my kids' favourite videos.


The embedded video won't be visible in the post editor unless you click on 'Preview' (just below the 'Compose' tab. Just click 'Hide Preview' to get back to the compose mode.

You Rock!
Now, go out there and add images, add video, don't break copyright, and be home before midnight ;-) And know that you truly rock!

Make Yourself Heard, Not Hurt

Alright, you've played around with layout and made some changes to the settings. It's time to write! Go to this page again (not sure what Blogger calls it)

Select the 'Posting' tab and you should be in the same screen as the image above. Let's look at the different parts of the post screen.


  1. The Title bar. You want to have a short, descriptive title and it wouldn't hurt if it were catchy. If someone is scanning posts and your title doesn't stand out, they may not read any further.
  2. The compose tab. This is where you will do most of your writing. It is a wysiwyg editor (what you see is what you get). There will be some occasions when you will want to use the 'Edit HTML' tab, for example, if you wish to embed a video from YouTube, you will have to copy the embed code and insert it into the HTML editor.
  3. Writing area. This is where you compose your post.
  4. Labels. For each of your posts you should choose one or more labels or 'tags' to describe it. This helps people who are looking for posts on specific things.
  5. I've drawn a red box around the formatting tools. It's probably pretty similar to toolbars you've used in word processing programs.
If you are part way through a post and have to stop, click on the blue 'Save Now' button and then you leave the post page. When you want to go back and add to your post choose the 'Posting' tab and then select 'Edit Posts'. You'll get a page that looks like this:


The first post I've circled (#1) is a draft. To edit a draft just click on the word 'Edit' to the left of the title. The second post I've circled (#2) has been published. As you can see, you have the option of viewing it, which takes you to the post on the web or editing it. When you select edit you are brought back to the page where you can write your post. Once you are pleased with your post click on the orange 'Publish Post' button.

Where's the Hurt?
The title for this post is 'Make Yourself Heard, Not Hurt' because I want to highlight the fact that what you post will be published so that anyone on-line can view it. Your current employer, prospective employer, your students, their parents, and on and on. Many employers these day 'Google' applicants as a matter of course. A blog post about how you got hammered at so-and-so's party or how your current boss is an idiot will not paint you in a positive light. Even if you delete a post it is still out there. Sites like the 'Way Back Machine' have archived billions of websites since 1996.

I recommend you read this post by Jabiz Raisdana. Jabiz resigned from his job as a result of complaints over photos that he posted on-line. Check out this article in the Washington Post which looks at some of the things that teachers have posted on-line in the US and the repercussions.

In the next post we'll look at how to add images and video to your posts.

This is post #9 in the 'blogging 101' series.

Blog Layout

You'll notice that your blog looks pretty plain, and you'll probably want to add items to your sidebar(s). So again, you're going to have to get to your blog management tools. If you are viewing your actual blog, make sure you are signed in and then click customize. You're back to this screen.
This time you are going to select the 'Layout' tab and then 'Page Elements'.


The 'Gadgets' are the different types of items you can have in your sidebars and footer. Clicking on any 'Add a Gadget' boxes that I've got arrows to will bring up a new window with all the different gadgets you can choose from.


I've circled 3 of the key gadgets that I think every blog should have.
  • The Text gadget allows you to enter any text you would like. This is a good place to tell readers a little about you and your blog. When readers are deciding whether to subscribe to your blog, this might be the key to winning them over. In the sidebar for this blog I used the text gadget for 'About This Blog'.
  • The Feed gadget allows you to put an RSS link on your blog, just like the one at the top of my sidebar.
  • The Labels gadget is useful because it lists all the labels or tags you've used in your posts. If you wanted to read all of the posts I've written for blogging 101 you can just click on it in the Labels section of my sidebar.
There are other fun gadgets available so do a bit of exploring!

Up Next...
In the next post I will describe how you write up a post and publish it.

This is post #8 in the 'blogging 101' series.

Blog Settings

You now have your own blog, but before you start posting there are a few changes you will probably want to make to the settings and layout.

Making Changes
Once you are on your blog site if you are not already signed in, click on 'Sign In' in the top left hand corner. Then you click on 'Customize'.

You'll be at this screen again.
There are a lot of settings, I'm just going to have you make a few changes right now. The first one I think is crucial. That is allowing anyone to comment on your blog. For some reason the Blogger default is to only allow 'registered users' to comment. That eliminates a lot of folks. Read this post on how to set up comments so that anyone can comment. Then come back here.

Comment Moderation and Spam
If you go to the 'Settings' tab and select 'comments' you can make the following changes if you wish.

Many bloggers, beginners and others, choose to have 'Comment Moderation' on their blog. This means that a comment is not posted on the blog until you, the blog owner, approves it. The downside is that it discourages some people from commenting. When I comment I like to see my pithy prose up on the blog ASAP! However, no one wants rude or inflammatory remarks on their blog, so it is a balancing act. You can delete any comment on your blog anytime, regardless of whether you have comment moderation on or not, though you will want to delete sparingly. To get to comment moderation, scroll down to the bottom of the 'comments' page.

In the screen shot above you can also see the 'word verification' option. By selecting 'yes', you are ensuring that only human beings are submitting comments, and not spambots.

In the next post we'll look at organizing the layout of your blog.

This is post #7 in the 'blogging 101' series.

Monday, August 25, 2008

Blogging 101 Survey

This post is for those folks who are planning on attending the 'Blogging 101' session on Thursday, August 28th, 8:30 to 1:30 in Penticton. Please fill in the survey below in order to give me an idea of where participants are at in terms of their tech background. Thanks!

Sunday, August 24, 2008

Setting Up Your Blog

Ok, so now you know how to find blogs, how to set up Google Reader, and how to subscribe to blogs. Now it is time to create your own blog!

Google's Blogger
I've chosen Blogger (aka Blogspot) as the blog

Photo by a trying youth
Attribution-NonCommercial-NoDerivs License
platform to host your blog. There are other free blog platforms to choose from such as WordPress, Edublogs, TypePad and others. I have chosen Blogger for this session because it is very easy to set up, Google is constantly improving it, and it means that you only have to sign up with one company to get both your blog platform and your RSS reader.

Here We Go
Go to Blogger and, since you've already set up your Google account, fill in the sign in information, then click the 'Sign In' button.

Fill in your 'Display Name', click on the 'Acceptance of Terms' box, then click 'Continue'.


Now you need to
  1. Decide on a name for your blog. You want to give some thought to your name. The first blog that I set up I called 'Claire's World'--kinda had a Chevy Chase cachet to it (I later ditched it). After choosing the title for this blog, Tech Pro-D Tools, I had a commenter write "I do wonder about the title; not sure what Pro-D means." Hmm. My main blog is called Clarify Me, which I'm content with for now. I'm still waiting for the Rheostatic fans to find me...
  2. Choose an URL (web address). Give this some thought too. I suggest you choose something relatively short and meaningful. Enter your choice, then click 'Check Availability'.
  3. Select 'Continue'
Now you can choose your blog template or look. There are a number to choose from and you can change them around at any time. Then click 'Continue'.

Now you'll come to a screen that says "Your blog has been created!" Click on the 'Start Blogging' arrow.

The screen will now look like the shot below.

Advertize!
You now have blog! Never mind that there's nothing in it yet. Let the rest of us know what your blog is called and the address. You can do this by including it in the comment section of this post.

How To Comment
Comments are the raison d'etre for many bloggers. You post something, then you wait expectantly for the first response in your comment section. Figuring out how to comment can be tricky at first, because different blog platforms and templates are set up a little differently. Check out this post on how to comment on this blog.

Subscribe to Your Own Blog
As I mentioned previously, blog readers don't always show all the images or other media in a blog post. By subscribing to your own blog you are able to see how those subscribing to it may be seeing it. After reading one of your own posts in Google Reader you may see the need to go back and edit your post to point out to readers that you've got an image or video they may want to view.

What Next?
Before you actually start posting to your blog, you'll need to deal with the settings and layout. I'll discuss how to do that in the next post.

This is post #6 in the 'blogging 101' series.

Sunday, August 17, 2008

Getting Going With Google Reader

Hopefully you're on your way to being convinced that RSS is a great way to keep up with posts on the web. This post is going to step you through signing up for a Google Reader account and subscribing to blogs. Google Reader is a feed aggregator--it brings together the web content that you subscribe to in one place. This is where you'll see if your favourite blogs have any new posts for you to read.

Signing up!
The following video describes how to sign up for Google Reader:


And here's a step-by-step non-video for those of us who learn better this way ;-)

  1. Go to http://www.google.com/reader
  2. If you already have a Google account, then sign in. If you do not have a Google account click 'create account'.
  3. Fill in the required information in the 'Create an Account' Page.
Adding Feeds
Now that you've signed up for Google Reader you need to find out how to start subscribing to all those great blogs you're finding. The following video explains how to do this.


In addition to the method that Liz Davis describes in the above video, there are a couple of other options.

'Subscribe to this blog' button
Some blogs will have a 'Subscribe to this Blog' area which may look like this:

Clicking on the orange RSS icon will get you to a page like this:
Now you should click on the Google button that I've circled in the image above. It will take you to your Google Reader page where it has added the blog.

Adding the blog address directly
Bring up the blog in your browser window, then highlight the web address and copy it (Ctrl c). Now go to Google Reader and click on 'Add Subscription'.
The 'Add subscription' box will pop up and you can paste the blog address there (Ctrl v).


An Important Note
When you view blog posts in Google Reader, it may not always show the images or videos. It also will not usually show the comments that people have left. So if a post isn't making sense (images or video missing) or if you'd like to see what people said about the post, you can click on the title of the blog post to view that post in its home on the web.

Go Forth and Subscribe!
Now, go back to some of those great blogs you found and start adding them to Google Reader!

For the 'Gifted' Ones in the Crowd...

If you've gotten this far and it isn't even time for the first break yet, you might consider watching this video on how to manage your subscriptions in Google Reader. If you don't have time right now, check it out later when your not so busy (summer '09?!)


Next up, we'll start setting up our own blogs!

This is post #5 in the 'blogging 101' series.